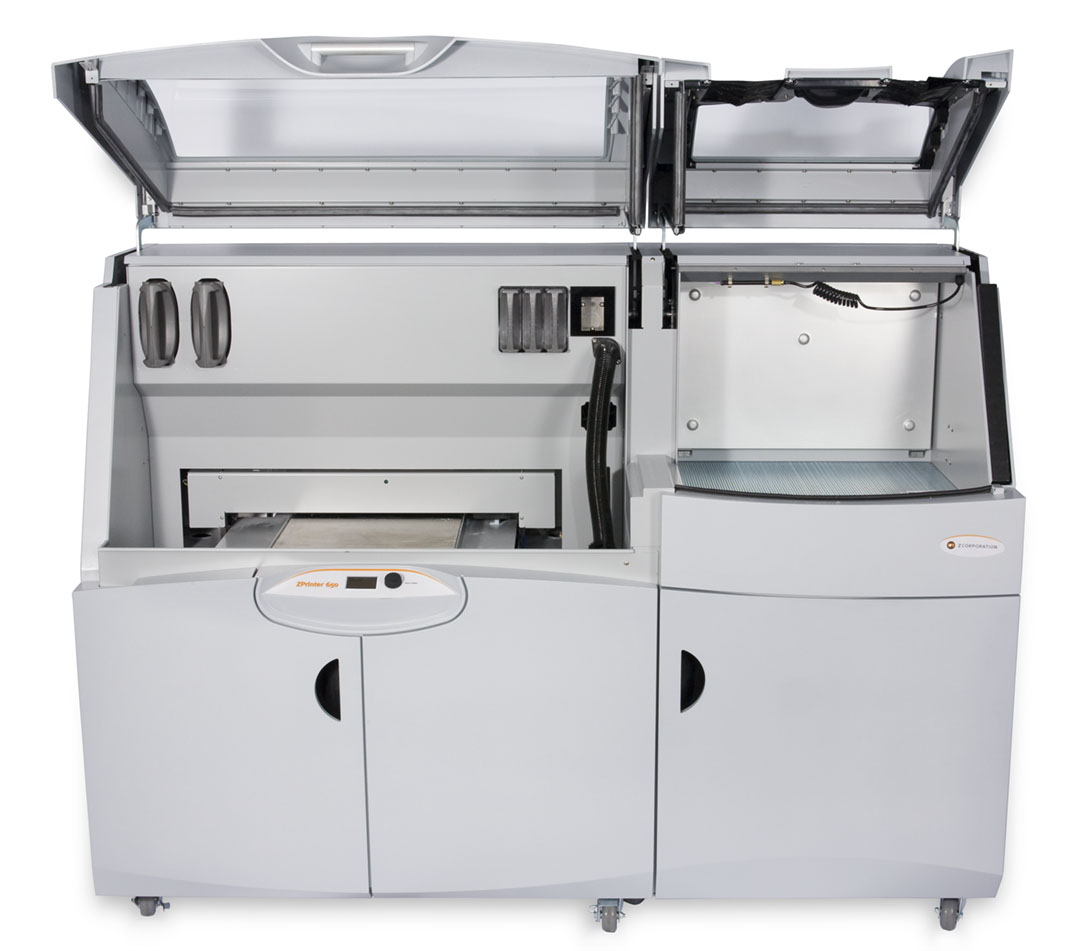
At Sparx Engineering, we heavily rely on our 3D printers for rapid prototyping. It’s very rare to not hear at least one of our 3 machines printing something. Some days it’s the ultra-high resolution Z-Printer 650, the small Cube 2 3D, or the new MakerBot Replicator Z18.
Z-Printer 650 Cube 2 3D MakerBot Replicator Z18
3D printers are great for prototyping systems. They offer very quick feedback on designs regarding fit, appearance and functionality. Additionally, many times the printed part is strong and accurate enough to be directly used in your system. Instead of designing a part in a CAD tool, sending it off to a fabricator, approving the returned drawings, issuing a PO, waiting for the part to be fabricated, then waiting for it to arrive – you can simply CAD up a model and print it in a few hours. If the design has an issue, simply tweak the model and reprint. A failed 3D print will cost you a few bucks in PLA, a failed 3rd party fabrication will cost you hundreds, not including the time potentially wasted waiting on it to be complete.
Personally, I’m absolutely fascinated with the technology and where it is going.
The strength of PLA printed parts is generally good. It is certainly nowhere near the strength of injection molded plastic or machined metal parts, but is plenty strong for printing brackets, custom parts, or motor mounts.
Lately, I have been using a Cube 2 3D printer from 3D Systems for many of my prototype components.
The Cube 2 3D printer is a simple machine that is very easy to use. The software interface is a bit too dumbed down for my liking, but it gets the job done. The software has limited options and those with experience using Slic3r and GCode may find it almost childish. It is mainly used to orient parts for printing and setting the print density.
Many 3D printers use GCode for the printing instructions. With GCode, you can visualize each section of a print in 2D, layer by layer, revealing path and even speed that the nozzle will take to create the object. The Cube-3D printer uses a proprietary intermediate file type for printing instructions. This file does not show the direction of the lines of PLA as printed. However, after using the printer for a while you can predict the nozzles path for most objects.
With the Cube3D software you have the choice of print density and can select between “hollow”, “strong”, and “solid”. The “hollow” option will fill print a thin outside shell with a very light pattern of PLA that adds some structural rigidity to the object. The Strong option prints a relatively heavier shell and a heavier pattern adds significantly to the objects rigidity. The Solid option prints a very thick shell and a very dense fill pattern. It isn’t exactly “solid” but any more would be a waste of material. Strong is certainly the most rigid option, but it uses quite a bit more PLA and takes nearly 2.5x the time to print as Hollow. This option should only be used if absolutely necessary.
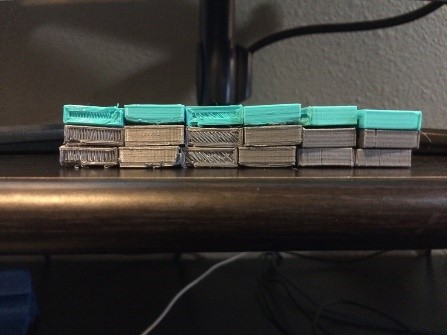
Here is a picture of the same parts printed with the “hollow“, “strong“, and “solid” setting:
HOLLOW STRONG SOLID
The print times vary greatly between the density settings. The “solid” configuration takes almost 2.5 times longer to print (an most likely uses 2.5 times the material):
Hollow: 3 hours 4 minutes
Strong: 4 hours 15 minutes (~40% more time than “hollow”)
Solid: 7 hours 15 minutes (~136% more time than “hollow”)
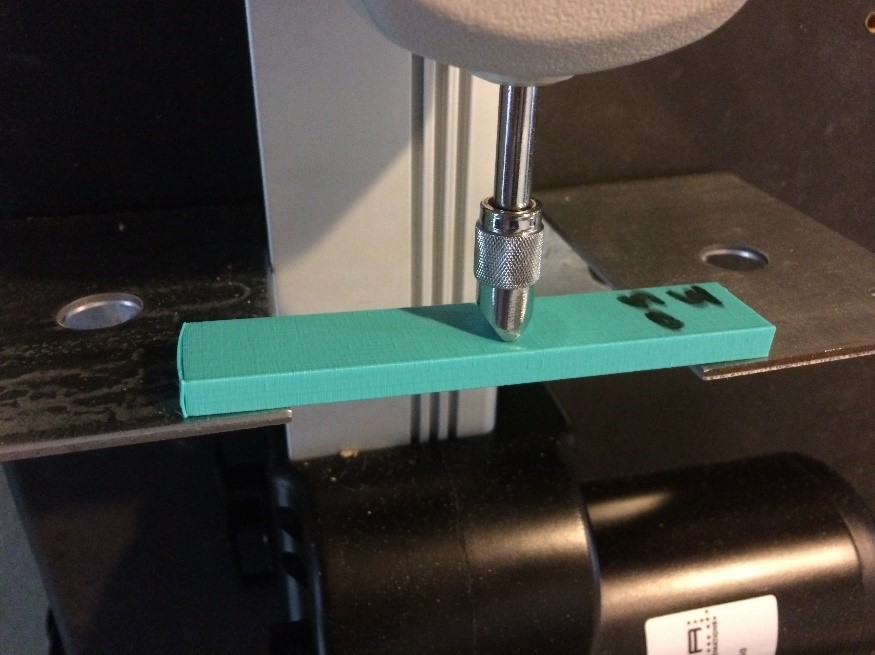
As I gain experience in 3D printing technology I have come to see that the orientation of how an object is printed has quite an impact to the strength of the object. In some cases, print orientation can contribute just as much to the strength of a print as the density. This post will analyze how both filling density and orientation contribute to an objects relative strength by measuring the force required to break a 4” x 3/4” x 1/4” printed part.
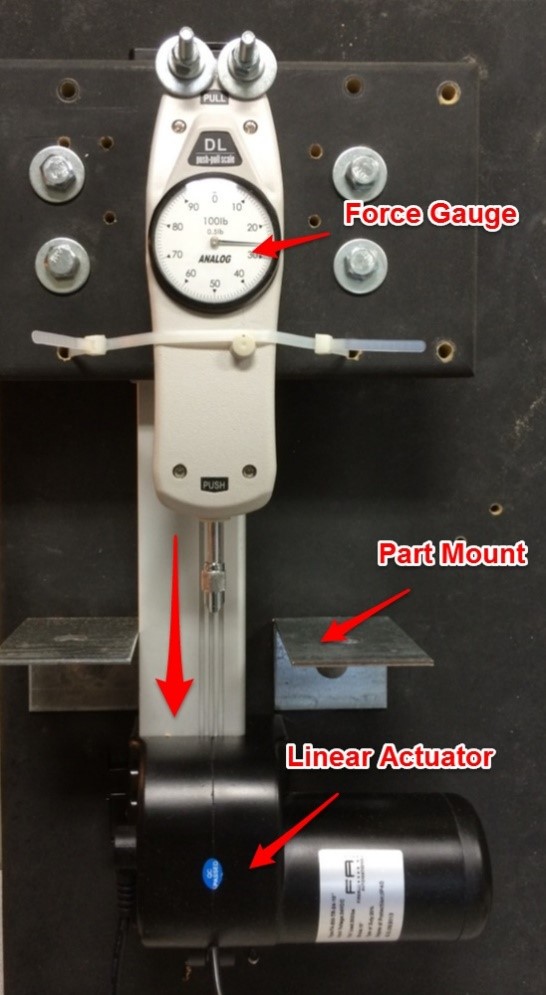
The Test
To test the relative strength of part orientation I am using a Heavy Duty 200lb Firgelli Automation Linear Actuator and an Analog push-pull force meter. I simply mounted the force gauge on the linear actuator and added two braces on the test stand to support the part. The Force Meter is driven into the center of the part which is supported on both ends.
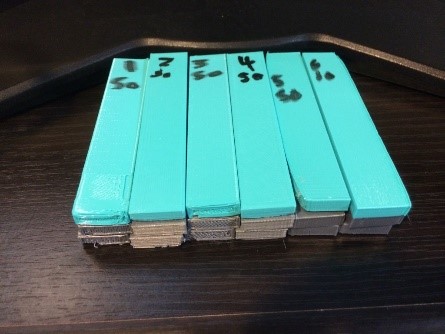
The Printed Pieces
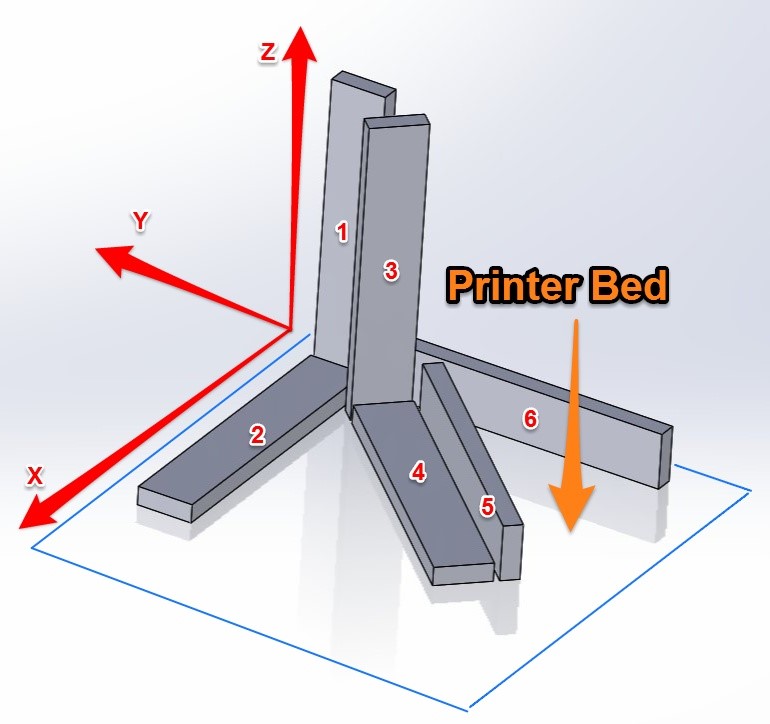
I picked a variety of part orientations to test.
1 – Standing on End
2 – Flat along the X axis
3 – Standing on End at a 45 degree angle from the X-axis
4 – Flat at 45 degrees from the x-axis
5 – Laying on Side at a 45 degree angle from the X-axis
6 – Laying on Side along the Y axis
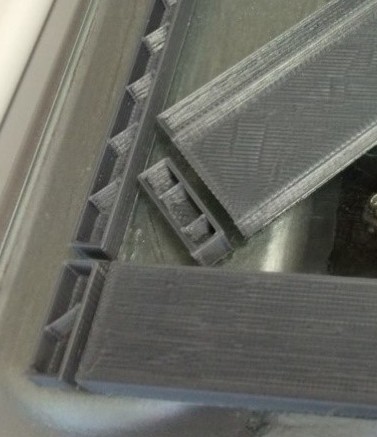
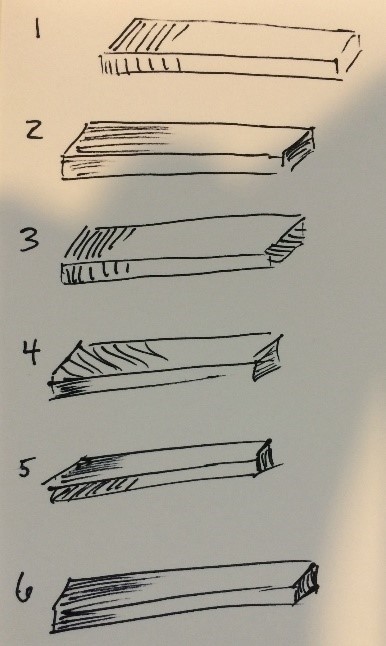
Here is a labelled illustration of the various orientations of the 4” bar.
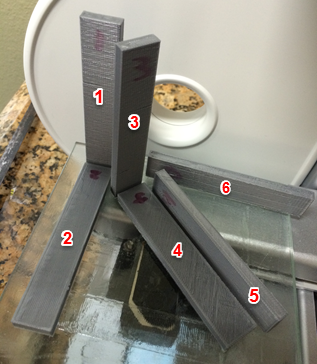
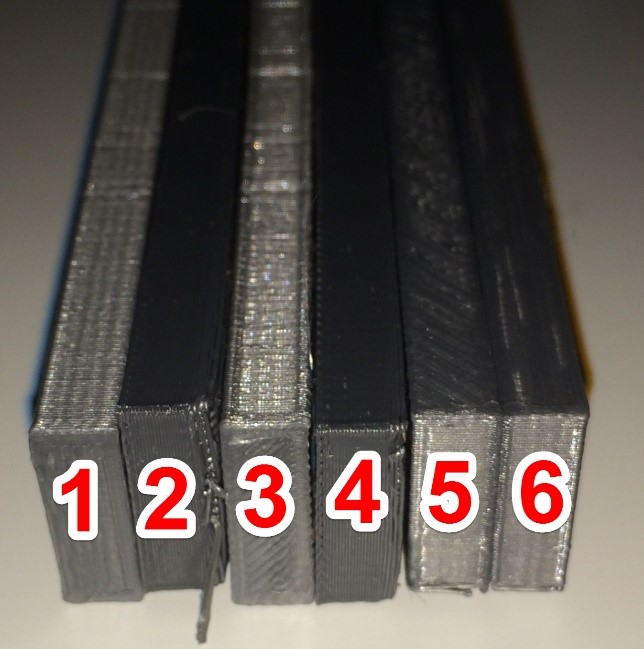
The final printed pieces are below along with a rough sketch depicting the print lines for each orientation. You can see the differing patterns on the faces of the parts due to the orientation.
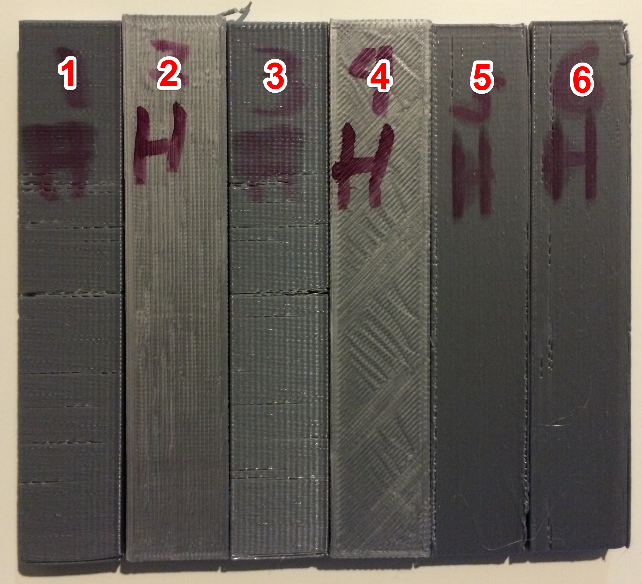
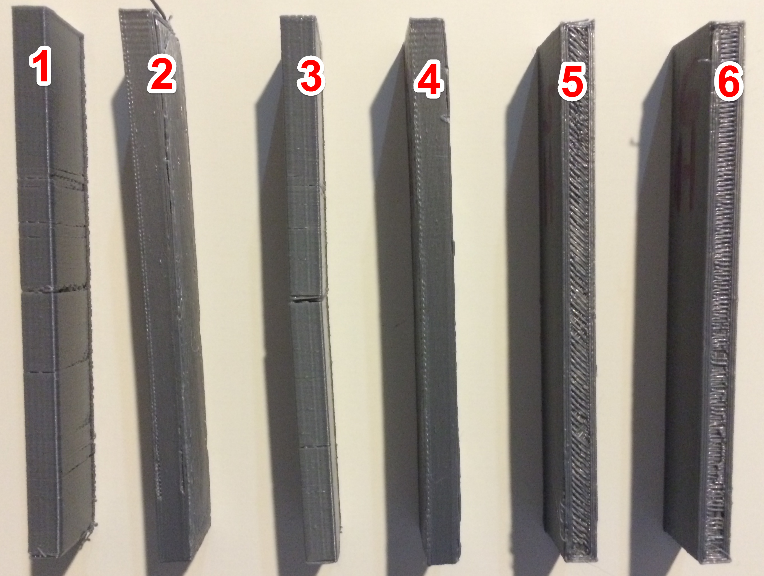
The 6 pieces were printed in each of the density configurations: Hollow, Strong, and Solid:
Results
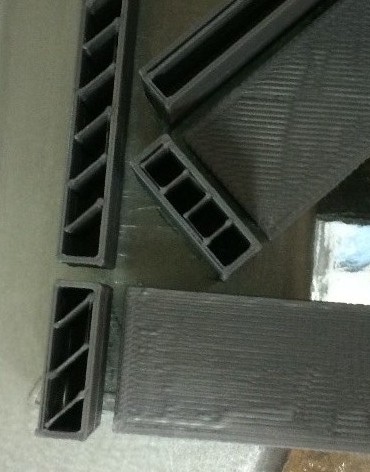
Here are each of the samples after the tests were completed (Hollow, Strong, Solid). These illustrations show how differently the parts bread due to the varying print orientation.

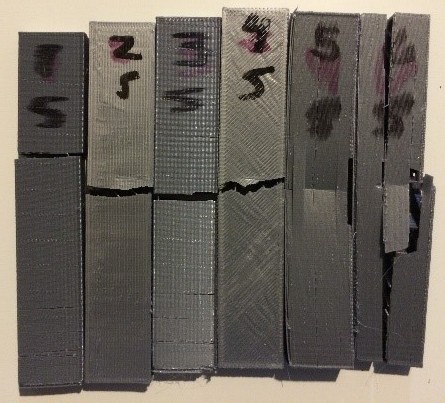
HOLLOW STRONG SOLID
The chart below illustrates the results of the test.
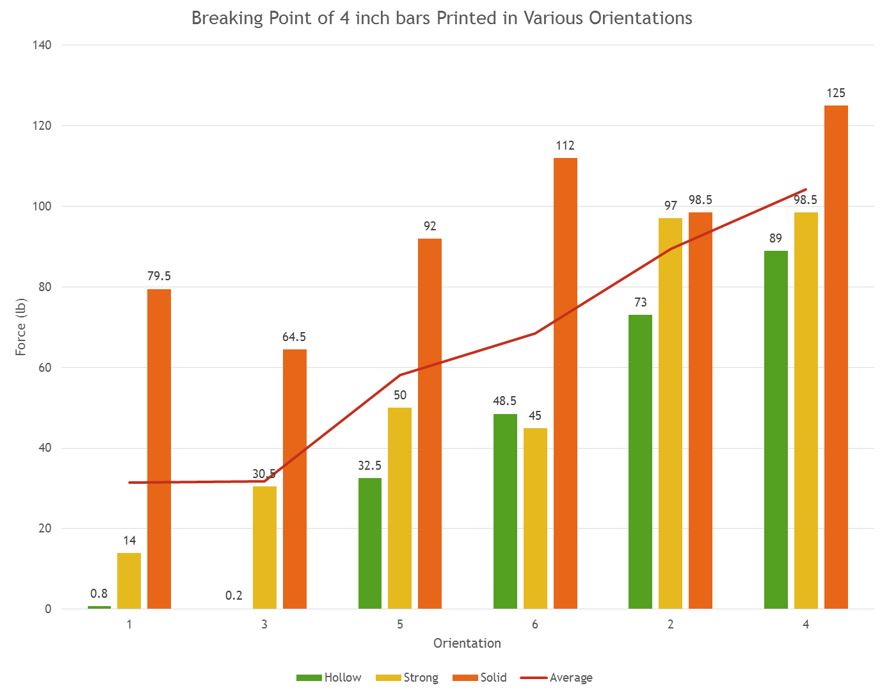
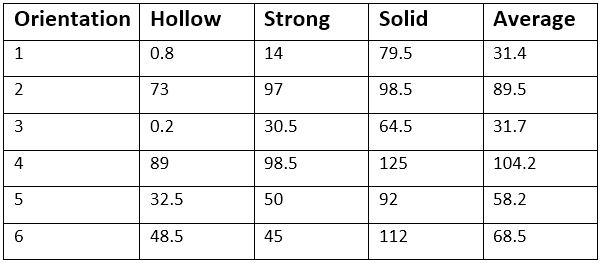
The part that performed the best was orientation 4 (Flat at 45 degrees from the x-axis). The rigid surface that was printed at a 45 degree angle to the edges of the part gave the part the ability to handle internal stresses from more than 2 directions. Even the Hollow print of this orientation required almost 90 lbs of force to snap (compared to <1lb for orientations 1 and 3).
Orientation 1 and 3 were the poorest performers because the printed lines on the faces of the part paralleled the edges. This pattern relied on the bonding strength of parallel PLA lines, which results in minimum adhesion area. For the Hollow prints of this orientation, there was only 2 layers of bonded PLA to take the pressure. The force required to break barely registered on the force Gauge (< 1lb).
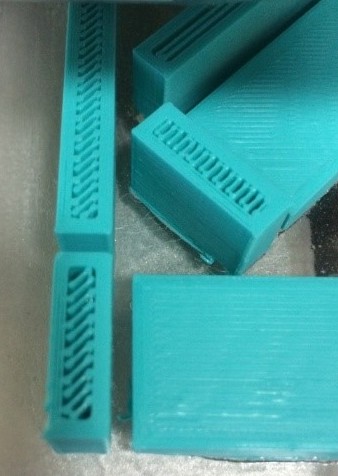
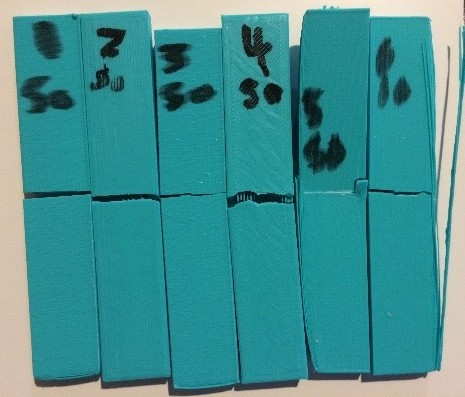
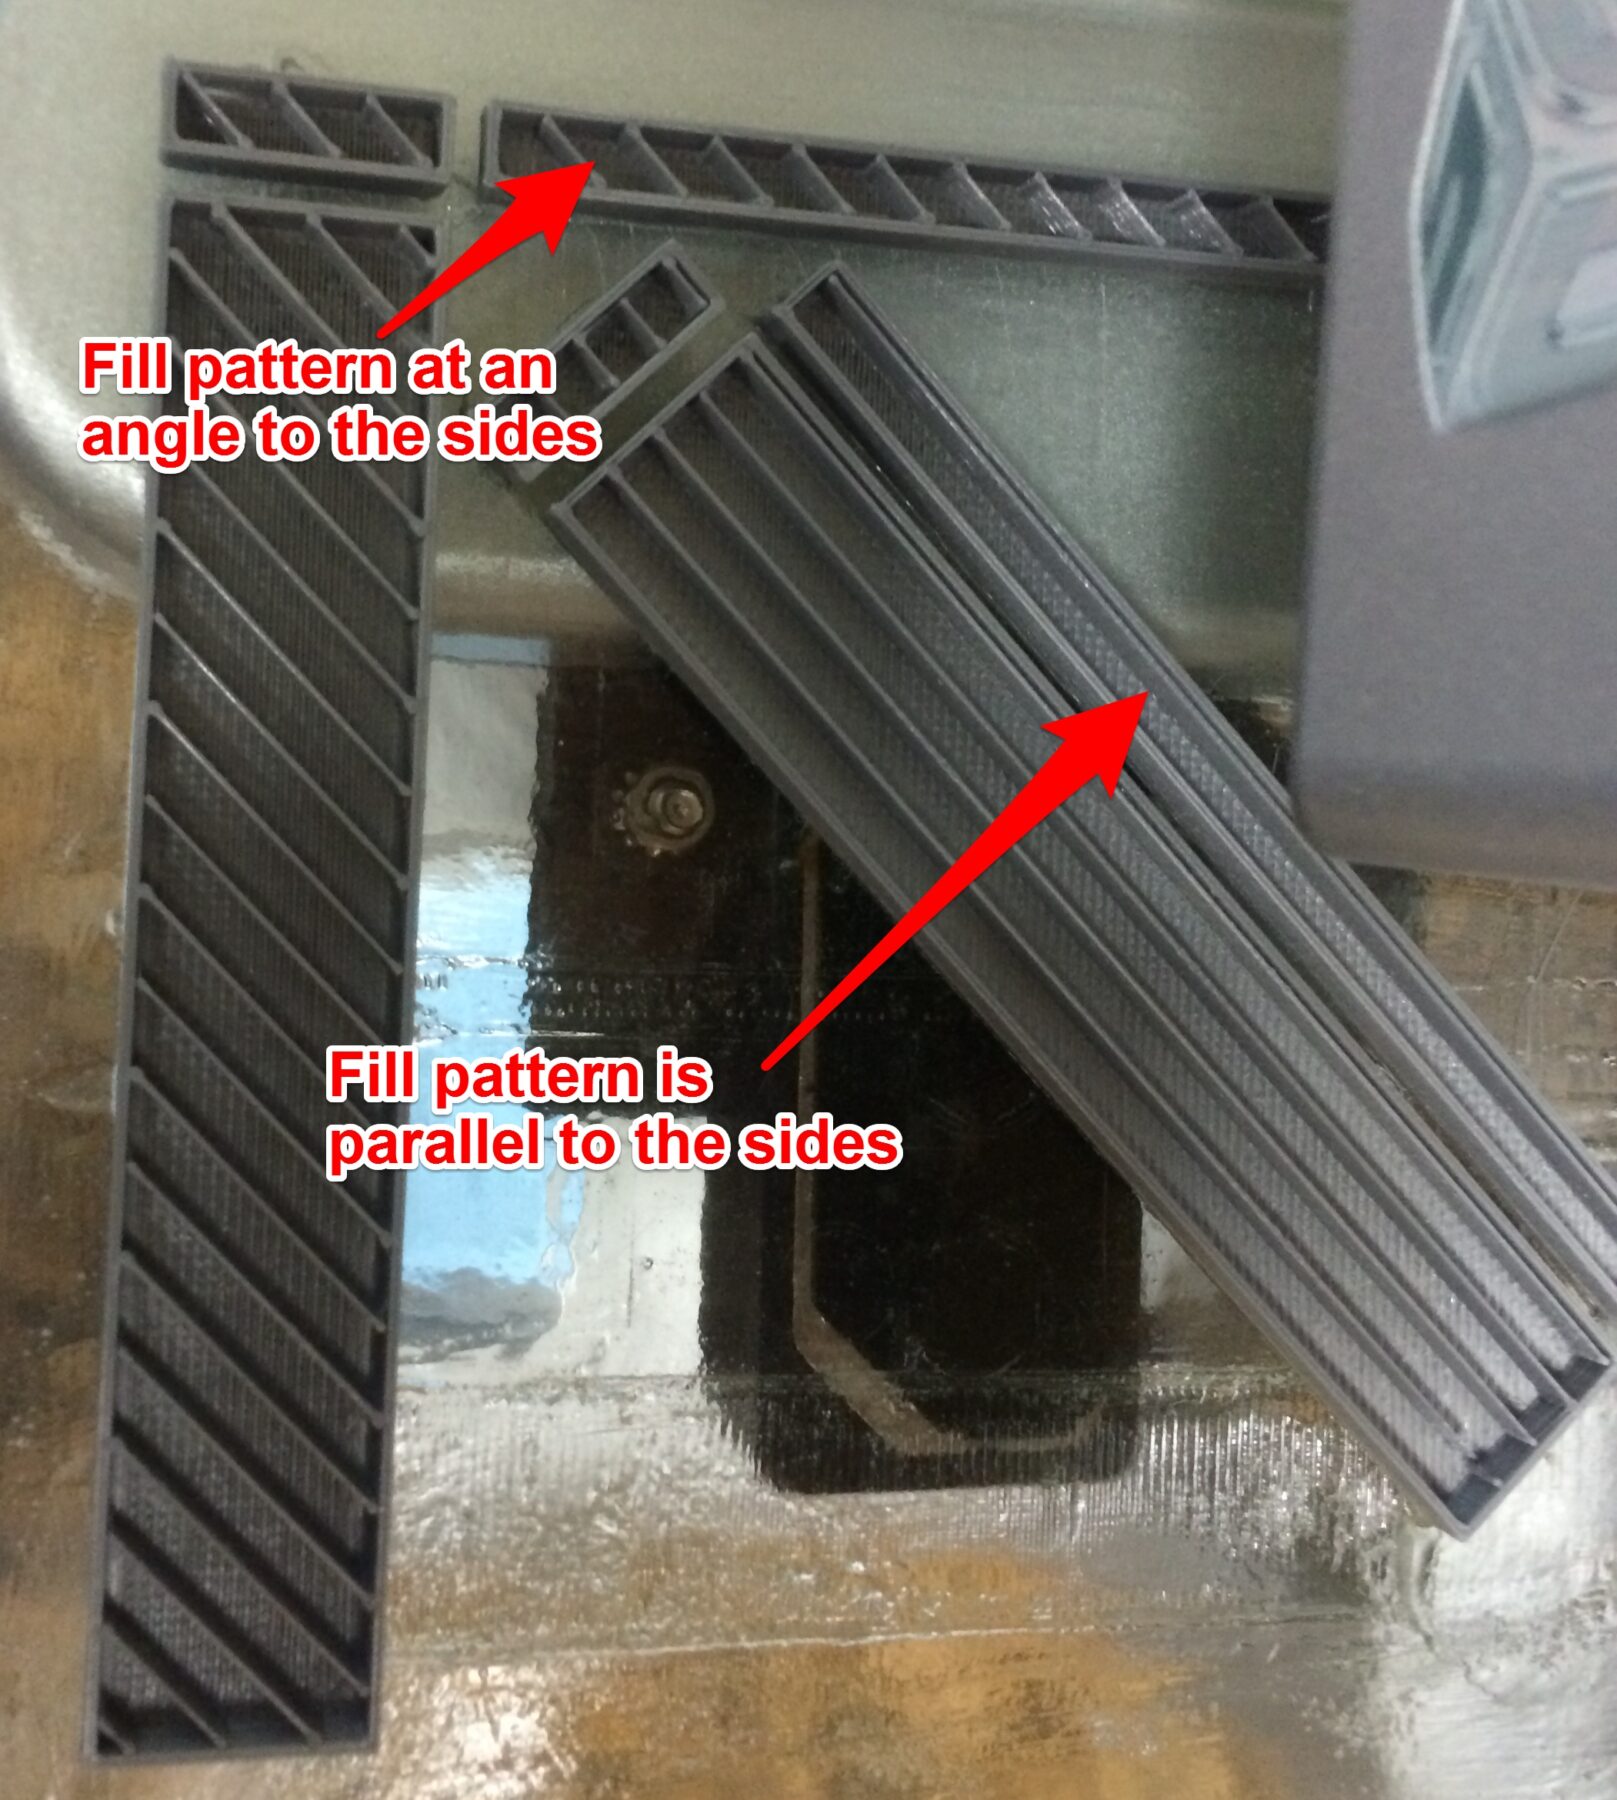
Orientation 5 performed worst than Orientation 6. This is mainly due to the fact that the pattern used to fill the object was parallel to the edges of the part. Having the fill pattern at and angle to the sides better reinforces the object. The difference can be seen in this pic:
The prints of Solid density were all relatively rigid regardless of orientation. However, as noted above, the print time and PLA use was far greater than the other fill types.
The information from this little experiment should give you a better understanding as to how to position your parts for printing. It may be as easy as rotating your part 45 degrees to more than double the strength of your print. Or, if you don’t mind the excess material use and long print times, you can’t go wrong with the “solid” print density configuration.
12 Responses
Thanks! It would be great to see more materials used with the same tests.
Hello, thank you for the info, On the cube 2 dose the x axis control the print bed going forward and back, and the Y axis is where the extruder goes left to right?
I am asking because I have a dead cube 2 a friend gave me, the mother board was damaged by water spill.. so I am using a ramps 1.4 board, and I want to configure correctly.
“Orientation 5 performed worst than Orientation 6. This is mainly due to the fact that the pattern used to fill the object was parallel to the edges of the part. Having the fill pattern at and angle to the sides better reinforces the object.”
Please correct me if I’m wrong, but wasn’t orientation 5 the only one at any kind of an angle and 6 was completely parallel to the edges? If so, why would this be the case? Perhaps it has to do with 6’s longer grains distributing more of the weight?
Are you looking for the best 3D printers for sale? Snapmaker is the only place to go! We have an extensive selection of modern 3D printers for sale that are intended to help manufacturers, artists, and hobbyists alike. Thanks to our cutting-edge technology and functional features, you can execute your ideas with accuracy and simplicity. Our 3D printers produce superb outcomes, from practical prototypes to artistic creations. Explore our selection at https://us.snapmaker.com/ to locate the ideal 3D printer for your requirements. Take advantage of this chance to unleash your creativity and join the vibrant Snapmaker user community. Purchase a 3D printer from Snapmaker right away!
If you’re looking for the best 3D printer under 5000 EUR, look no further than the Snapmaker 2.0. With its exceptionally impressive features, the Snapmaker 2.0 is an excellent choice. This all-in-one machine allows you to not only 3D print but also Laser engrave and CNC carve, providing limitless creative possibilities. With a sturdy construction and a generous build volume, it delivers high-quality prints with precise details. The user-friendly interface and intuitive software make it accessible for beginners while offering advanced options for experienced users. The Snapmaker 2.0 is exceptional for its performance and capabilities within a reasonable budget. Visit eu.snapmaker.com to explore this top-notch 3D printer further.
Your search for the best 3D Printer should start with Snapmaker. All you have to do when you want to buy a 3D printer is visit our website, go through the various models, and then make your choice. The item is reasonably priced. You’ll be happy you bought it. You may now work on nearly anything for your creative ideas with our new Snapmaker 3D printer, from everyday goods to things with unique mechanical features like hardness, toughness, and flexibility.
Small company 3D printers are very important since they offer many benefits to business owners. With these little machines, firms can quickly and effectively iterate designs while enabling cost-effective prototyping. Small enterprises can reduce manufacturing lead times and save on outsourcing costs by having their production facilities. A competitive advantage for small enterprises is provided by 3D printers, which also promote innovation by enabling customization and customized production. In addition, by fostering regional manufacturing, sustainability, and job development, these printers help the economy expand. In conclusion, small business 3D printers encourage entrepreneurship, boost productivity, and stimulate the economy.
Do you want to buy a 3D printer that suits our level of expertise? Are you looking for high-quality products that will not cost too much? Well, all you have to do is head to the Snapmaker website.
When you buy a 3D printer, it is essential to pair it with high-quality accessories and use the right materials too. This helps to ensure the longevity of your 3D printer and that you’ll get high-quality prints.
In addition, Snapmaker machines guarantee faster printing speeds without ruining the quality of your work.
The Easter season presents an excellent opportunity to take advantage of sales, and the Easter warm-up sale is no exception. Investing in a good 3D printer can truly change your life. You can create small action figures, 3D-print Easter eggs for your family or community, start a business selling these items, and so much more. A reliable 3D printer also allows you to extend the lifespan of your household appliances by printing replacement parts. Don’t miss out on the chance to save some coins and make a significant impact with your printing endeavors.
Ready for a game-changer? Snapmaker printers bring a world of benefits. Imagine being able to create intricate designs with a 3D printer small and the precision of laser engraving or even carving out unique patterns with CNC capabilities. It’s like having a workshop in your own space. Plus, with their quality materials and support, your creative journey is in good hands. Check out any of the series and accessories that are available in the online shops by Snapmaker. You can get something even when they are on sale and end up using it for a long time.
The Snapmaker 2.0 A350T bundle is the best 3D printer for a couple of reasons. The Snapmaker 2.0 A350T bundle is a versatile 3-in-1 printer that offers 3D printing, laser engraving, and CNC carving functionalities. This machine is designed to provide a seamless experience for creators, professionals, and hobbyists alike.
Not only is it a user-friendly model, but it is a very affordable tool. The 3d printer for sale is the best model to start your 3D printing experience. In addition, the modular design allows you to easily switch between functions.
A portable 3D printer that can build three-dimensional things out of various materials is called a tiny 3D printer. It constructs objects layer by layer based on digital blueprints using additive manufacturing technology. Small 3D printers are accessible, portable, and suited for small-scale production, home use, or educational purposes. Even though they frequently have a limited construction volume, they may create rich and detailed sculptures. They offer a variety of materials, such as resins and even plastics. 3D printers small are convenient, enabling users to experience the world of 3D printing and realize their ideas.